Are you working with a team or collaborating with a developer, an accountant, or a project manager? Instead of sharing your login details, you can provide secure and controlled access to your Kiravo account by adding collaborators.
Guide on how to add collaborators (team) to your Kiravo client account
This tutorial shows you step-by-step instructions on inviting new members, setting specific permissions for them, and managing your team’s access to services.
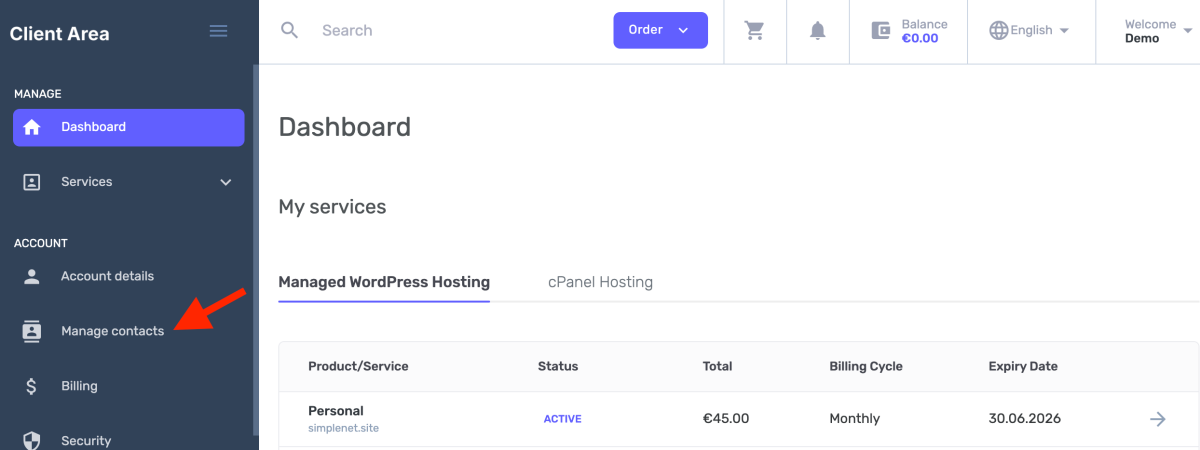
1. Log in and access the Contacts section
First, log in to the Kiravo client area. In the main menu, find and access the Manage Contacts section. Here you can see all the users who have access to your account.
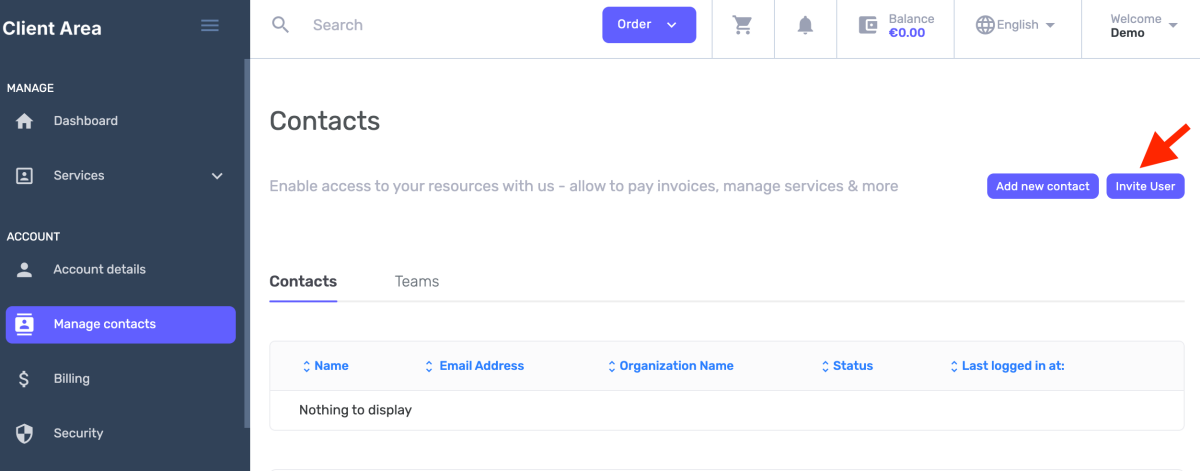
2. Add a new collaborator
You have two options for adding a collaborator:
- Click on Invite User (if the person already has a Kiravo account). Enter the person’s email address in the corresponding field. The system will recognise them automatically.
- Click on Add New Contact (if the person does NOT have a Kiravo account). Fill in the necessary details: account type, first name, last name, email address, etc.
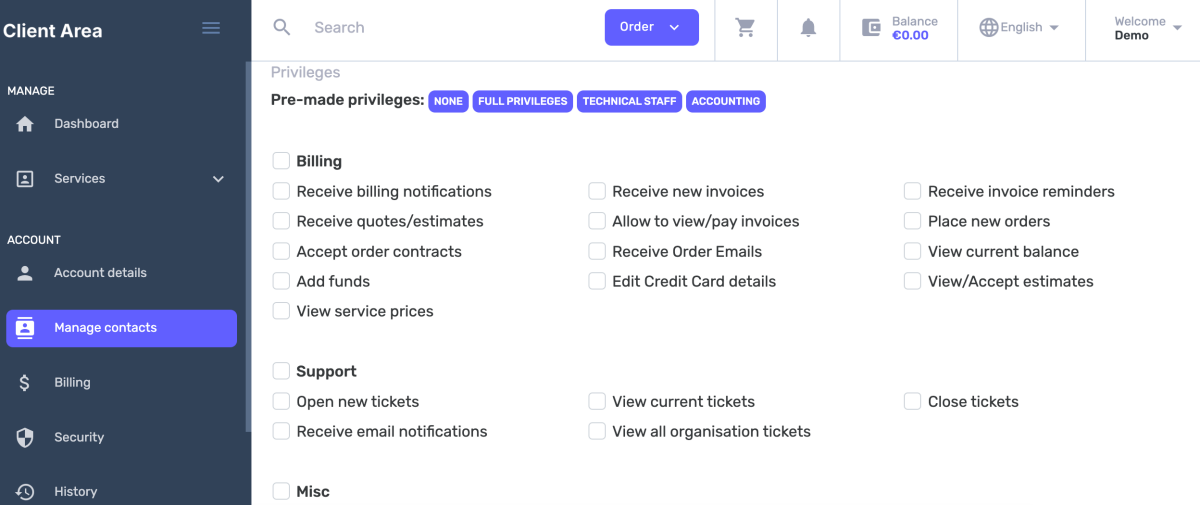
3. Set permissions (privileges)
This is the most important step. You can grant different access levels depending on the collaborator’s role:
- Predefined Privileges: You can quickly choose a set of standard permissions, such as:
- Full: Total access to all account sections.
- Personal: Access to the profile and personal data.
- Technical: Can view services and open support tickets.
- Billing: Has access to invoices, proformas, and payment notifications.
- Custom Privileges: For granular control, you can customise exactly what a user can do.
- Access to a specific service: You can grant access to only a particular cPanel hosting package, without them seeing other services.
- Restricting actions: You can check or uncheck specific actions, such as the ability to cancel a service or modify data.
4. Send the invitation
After you have configured the desired permissions, click the Submit button.
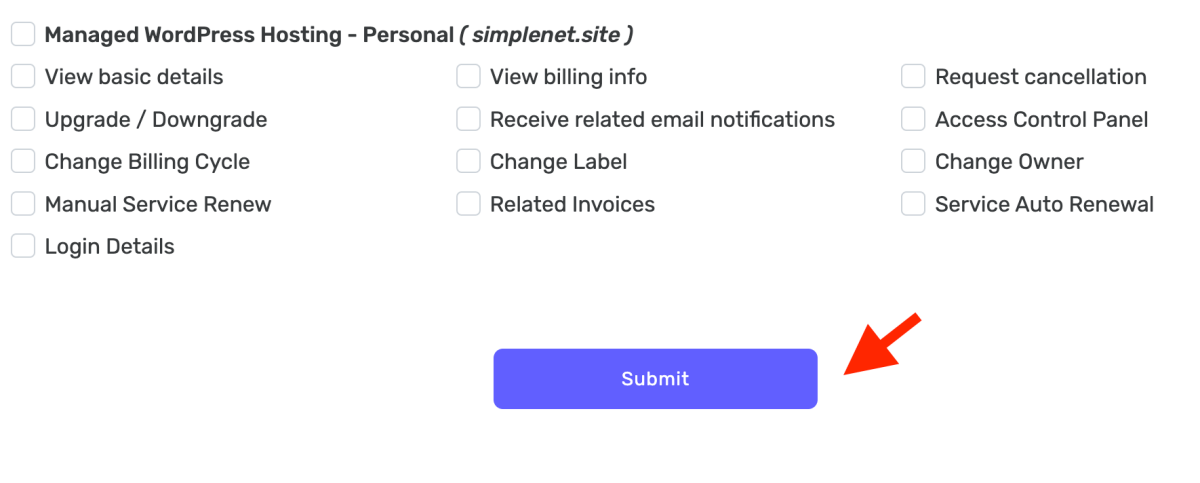
The respective person will receive an invitation via email to join your account. Once accepted, they can access the control panel with their login details, having only the rights you have granted them.
Managing collaborators is simple, secure, and gives you total flexibility in managing your online projects.
If you need assistance, do not hesitate to contact us.
Leave a Reply