To add a WordPress website on Kiravo hosting, log in to your control panel, select Add Website, then choose Install an app. Configure your server location, enter your domain name, and create a WordPress admin account with a username, email, and password. The system will then automatically set up your WordPress site.
At Kiravo, we aim to simplify the process of bringing your ideas online. Adding a new WordPress website to your hosting account should be a clear and efficient journey.
This guide will walk you through each step, ensuring a smooth setup, whether you are starting fresh or migrating an existing site.
Adding a WordPress website tutorial (video + instructions)
For a visual walkthrough, please watch our tutorial video below. It demonstrates each step in detail, from accessing your control panel to finalizing your WordPress installation.
If you prefer to follow instructions at your own pace, the detailed written tutorial below mirrors the video content.
1. Access your Kiravo control panel and add website
The first step is to initiate the website creation process from your Kiravo control panel. Log in to your Kiravo control panel. Click the Add Website button.

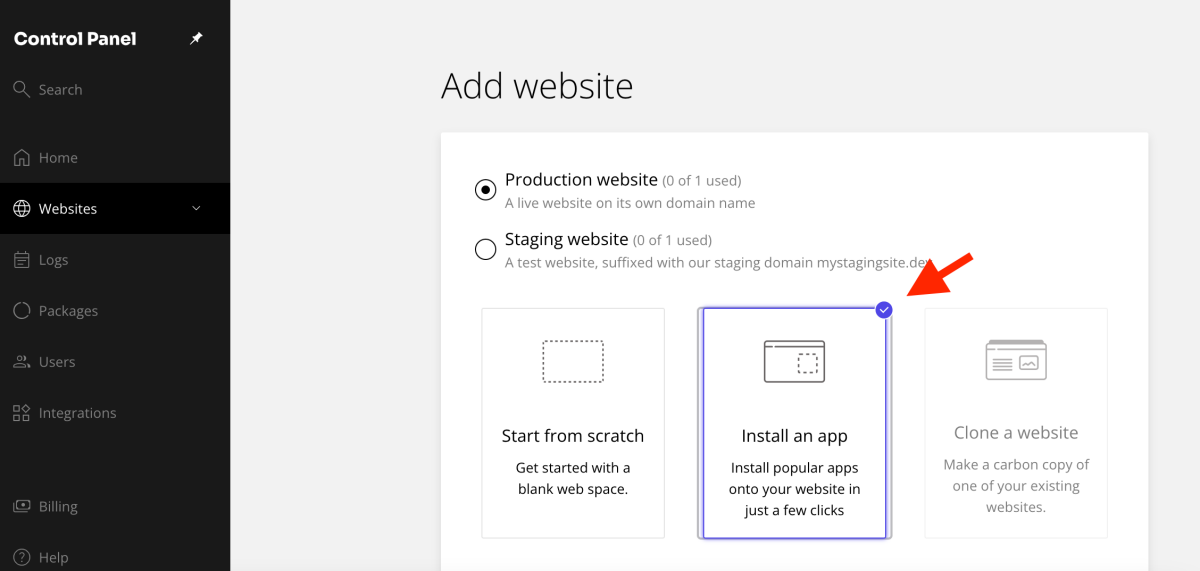
2. Choose your website type
You have several options when adding a new website. This choice allows you to begin your project with the foundation that best suits your needs.
First, select between a Production website (a live site on its own domain) or a Staging website (a test site using our mystagingsite.com domain).
Next, choose how you wish to build your site.
- Start from scratch: This option creates an empty web space for your domain. It is the ideal choice if you plan to upload an existing website manually or if you are a developer who prefers to build a custom project without a content management system (CMS). It provides a clean foundation, giving you complete control over the files and structure from the very beginning.
- Install an app: This is the most direct method for setting up a new WordPress site. By selecting this, our system will automatically handle the entire installation process for you. It installs the latest version of WordPress, sets up the database, and configures the necessary files. This path is recommended for its simplicity and efficiency, allowing you to start building your site’s content almost immediately.
- Clone a website: This feature becomes available once you have at least one other website on your Kiravo hosting account. Cloning allows you to create an exact copy of an existing site, including all files, databases, and settings. It is an exceptionally useful tool for creating a staging environment where you can safely test updates, or for starting a new project using an existing site as a template.
The easiest choice is to select Production website and Install an app to begin with WordPress. The option to clone a website will become available once you have existing websites on your platform.
3. Select server placement and add your domain
Optimizing your website’s performance begins with server placement. Choose a location close to your audience.
- Select a country for your server placement.
- Enter your desired domain name.

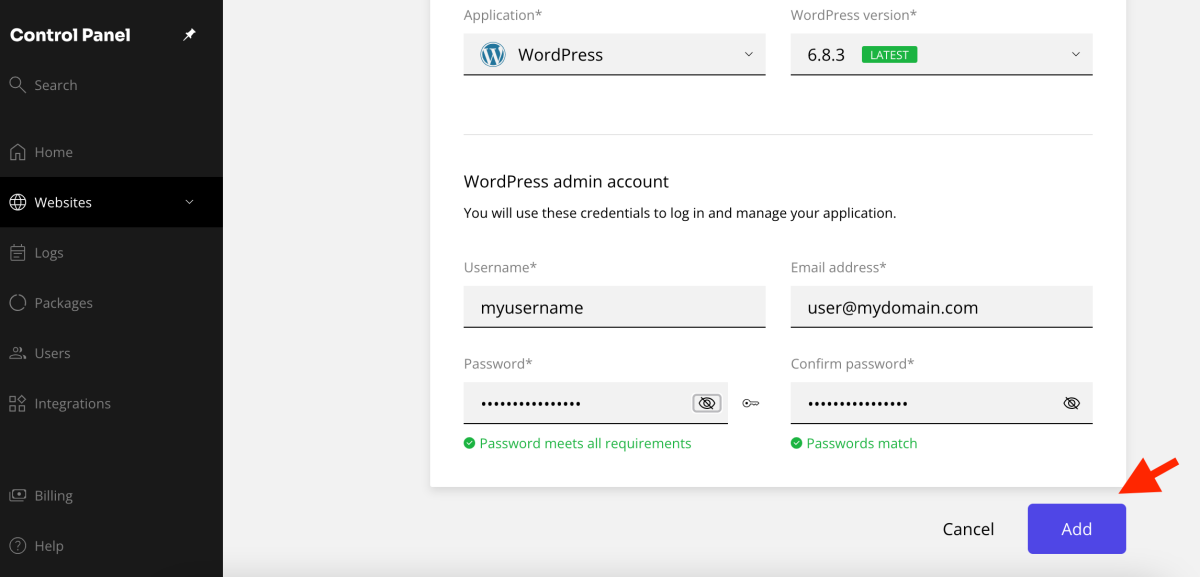
4. Create your WordPress admin account
This step sets up your administrative access for the new WordPress installation.
Enter a unique username for your WordPress admin account. Provide your email address. Choose a strong password. Click “Add” to proceed.
5. Connect your domain to Kiravo (If Applicable)
If you are adding a new website to an existing domain, you will need to ensure it points to Kiravo.
- For existing websites: If you already have a website on this domain and wish to move it to Kiravo, we offer free migration services. Simply send us a message to request a free migration.
- For new websites: If you do not yet have a website on this domain, you can update your nameservers. Alternatively, if you prefer to use another DNS provider like Cloudflare, you will need to update your A record to point to our server’s IP address.
By following these steps, your WordPress website will be successfully added to Kiravo hosting. If any questions arise during this process, our support team is ready to assist you. We are always one click away.
Leave a Reply