To change your website’s PHP version on Kiravo, log in to your control panel, select your website, navigate to Advanced -> Developer Tools, then find the PHP Engine section. Click on the current PHP version, choose the desired one from the dropdown, and click Update.
Keeping your PHP version up-to-date ensures your website remains secure, fast, and future-proof, influencing its performance, speed, compatibility, and security.
When you update the PHP version, you don’t just aim for performance. By patching security flaws, you can also reduce vulnerabilities. You ensure compatibility with the latest WordPress features and improve server efficiency, leading to faster page loading times.
Kiravo offers a wide range of PHP versions. You can choose from PHP 5.6 for older applications that require it, up to the latest PHP 8.4, which provides enhanced performance, security, and modern features.
This guide will walk you through how to easily update your website’s PHP version directly from your control panel, ensuring your site remains efficient and compatible.
Change the PHP Version in the Kiravo control panel (video + instructions)
For a clear visual demonstration of how to change your PHP version, please watch our video tutorial below.
If you prefer a step-by-step text guide, the instructions below detail each action shown in the video, allowing you to follow along at your own pace.
1. Access Your Website’s Advanced -> Developer Tools
The first step is to navigate to the specific settings for your website within the Kiravo control panel.
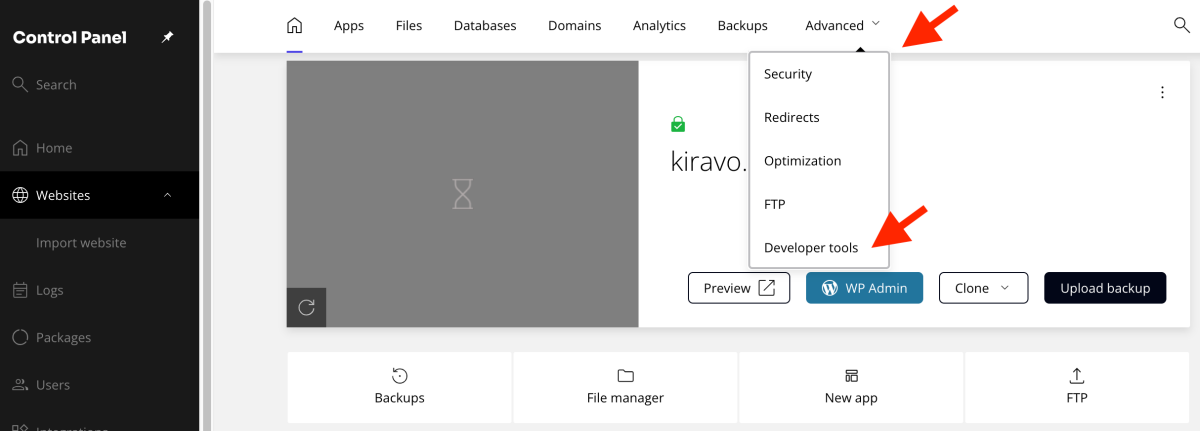
Log in to your Kiravo control panel. Click on the website for which you wish to change the PHP version. From the website management page, go to Advanced -> Developer Tools.
2. Change the PHP Version
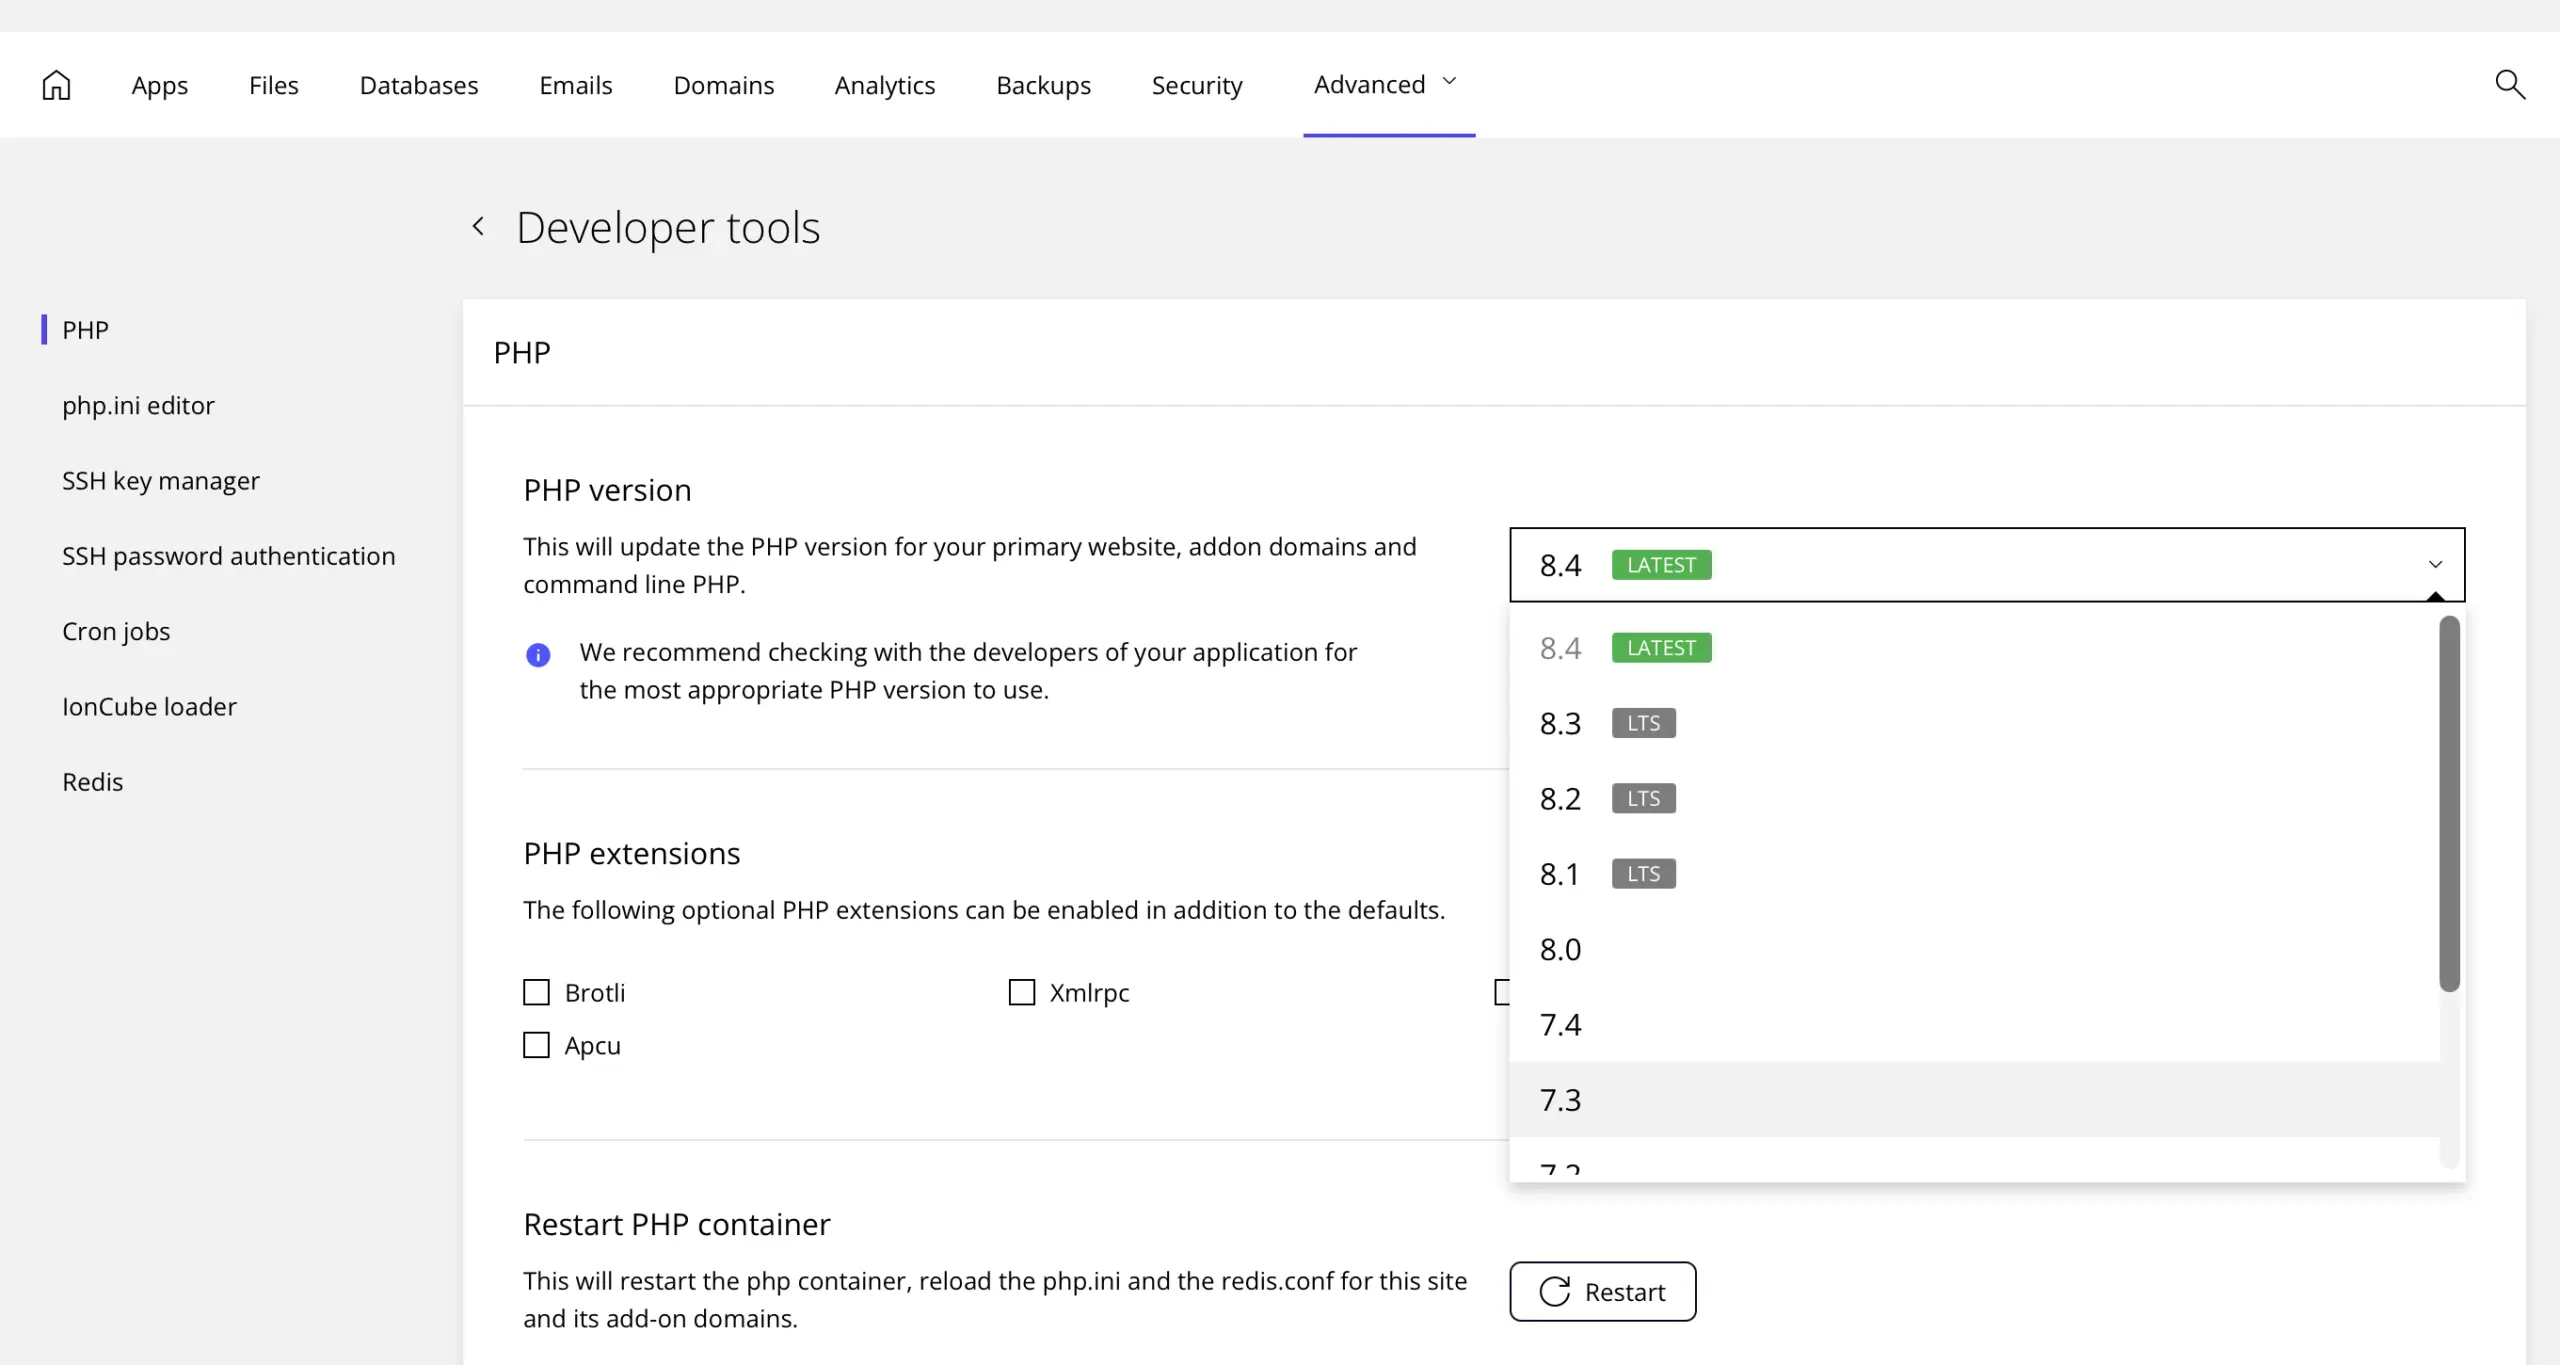
Within the Advanced Developer Tools, you will find the option to manage your PHP version.
Locate the PHP Version section. The default version is typically 8.3. Click on the current PHP version displayed. A dropdown menu will appear, allowing you to select a different PHP version (e.g., 7.4, 8.0, 8.1, 8.2, 8.3, 8.4). Choose the version that best suits your website’s requirements.
After selecting the new version, click the “Update” button to apply the change.
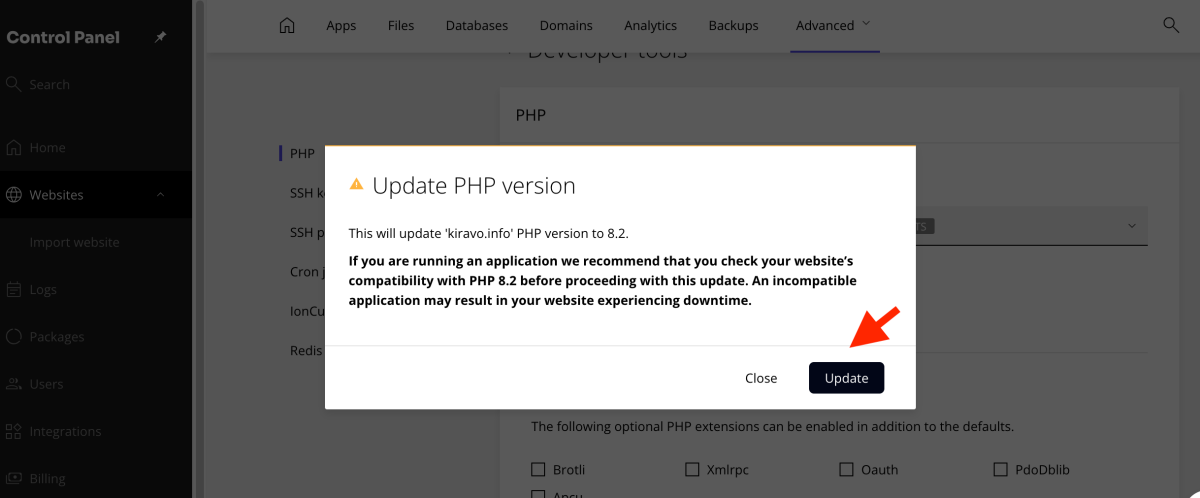
That’s it. Your website will now be running on the newly selected PHP version. This simple process helps ensure your site benefits from the latest performance improvements and security updates.
Always check compatibility
Before proceeding with any changes, ensuring your website’s theme and plugins are fully updated and compatible with the new PHP version is essential. Follow these steps:
- Update Plugins and Themes. Ensure all plugins and themes are updated to their latest versions. Outdated software can cause compatibility issues with newer versions of PHP.
- Review Compatibility. Check the developer’s documentation or support forums for information on PHP version compatibility. This action can save you from potential errors.
- Use the PHP Compatibility Checker Plugin. To simplify the process, install the PHP Compatibility Checker plugin on your WordPress site. This tool scans your website and reports any potential issues with your current theme or plugins and the PHP version you plan to use.
- Run a scan to identify any incompatibilities.
- Review the results and address any flagged issues before updating the PHP version.
Troubleshooting Common Issues
If your website experiences issues after updating the PHP version, follow the next steps:
- Enable Debugging.
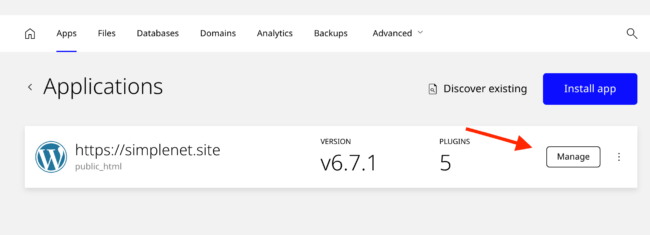
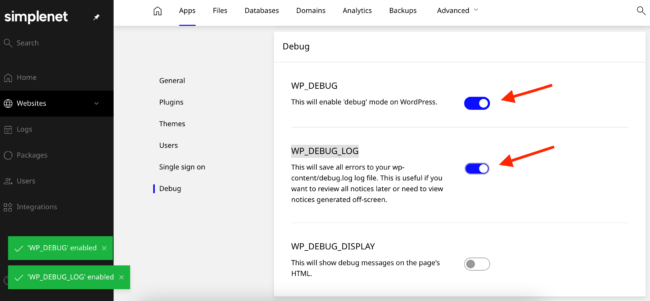
To identify errors, turn on WordPress debugging. In the control panel go to Apps and click on the Manage button (on the right side of your site).
From the left menu, choose Debug and enable WP_DEBUG and WP_DEBUG_LOG.
2. Revert to the Previous Version: If needed, revert to the previous PHP version from the control panel.
Upgrading your PHP version is vital for optimising your website’s speed, security, and compatibility.
If you have any more questions or need help, our support team is always available.
Leave a Reply