To secure your website, first, point your domain to Kiravo’s servers by either updating the nameservers or changing the A record in your DNS provider’s settings.
Once the domain connection is active, a free Let’s Encrypt SSL certificate will be issued and installed automatically. The final step is to enable the “Force HTTPS” option in the Security section of your control panel.
This process is designed to be straightforward, ensuring your site is secure with minimal effort.
For those who appreciate a more detailed, step-by-step guide, we have prepared a complete walkthrough below. It covers each stage of the process, helping you understand the context and confirm each step.
Tutorial for SSL Installation on Kiravo Control Panel (video + instructions)
For a visual guide, you can watch our short video tutorial that walks you through the entire process.
If you prefer to follow instructions at your own pace, the detailed written guide below outlines every step shown in the video. You can use it as a checklist to ensure your setup is correct.
1. Connect your domain to Kiravo
Before an SSL certificate can be issued, your domain must be connected to our servers. This is a fundamental step for verifying ownership and managing security.
First, log in to your Kiravo control panel.
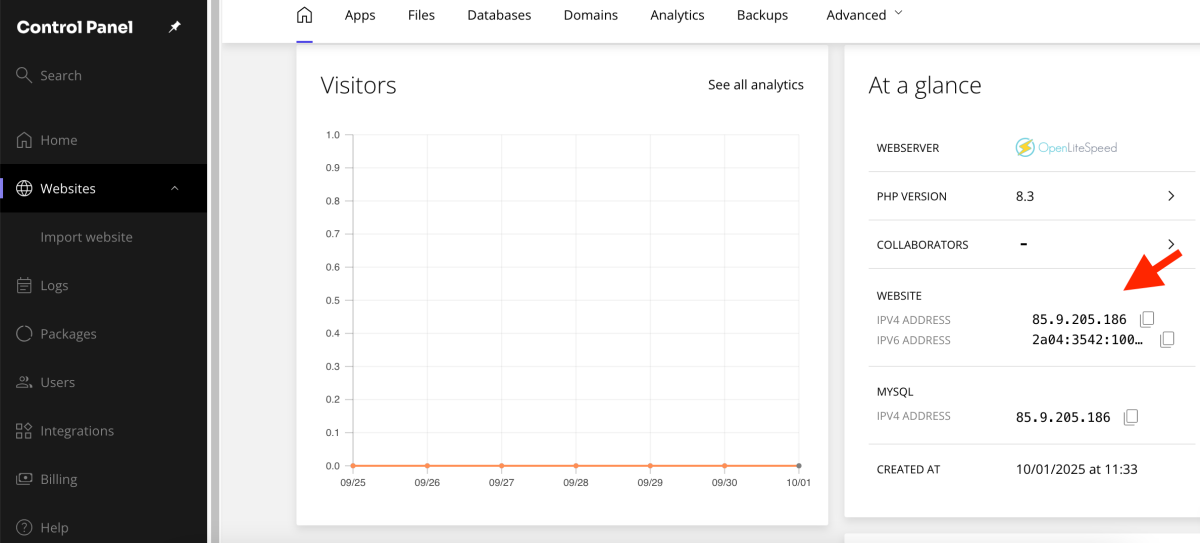
Locate the IP address for your server. You can find this in the “At a glance” section on the main page of your hosting service management.
Next, go to your DNS provider (e.g., Cloudflare, GoDaddy, etc.). Create or update the A record for your domain, pasting the Kiravo server IP address into the appropriate field. Save the changes.
After updating your DNS, please allow time for propagation. This process can take anywhere from a few minutes to several hours, depending on your provider.
2. Verify the Automatic SSL Installation
Once propagation is complete, our system will automatically detect the change and issue a free Let’s Encrypt SSL certificate.
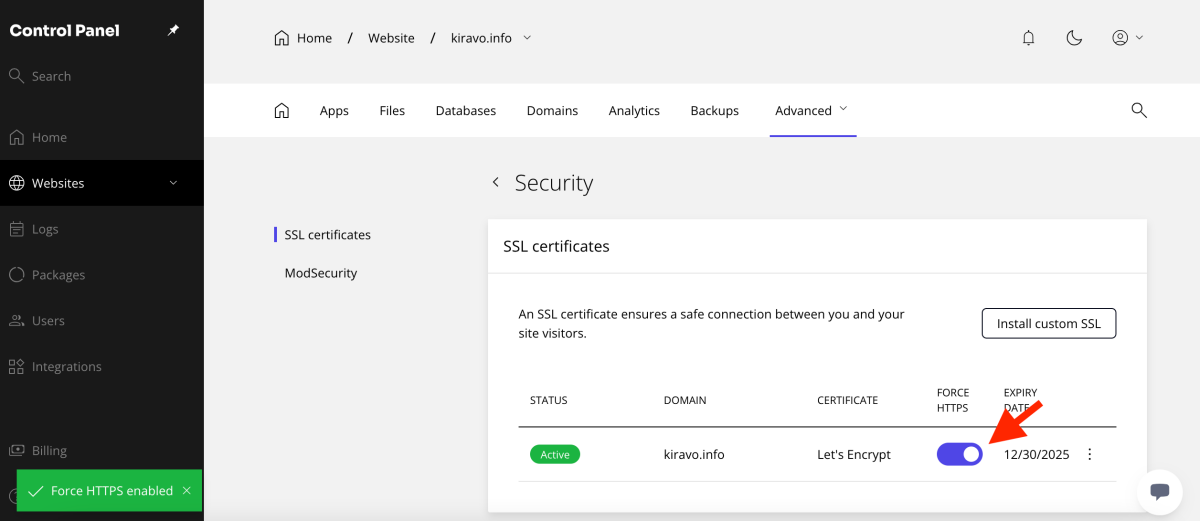
In your Kiravo control panel, navigate to the Advanced tab, then to the Security section. You will see that a certificate from Let’s Encrypt is now active for your domain. The “To connect your domain” notice will no longer be visible on your dashboard.
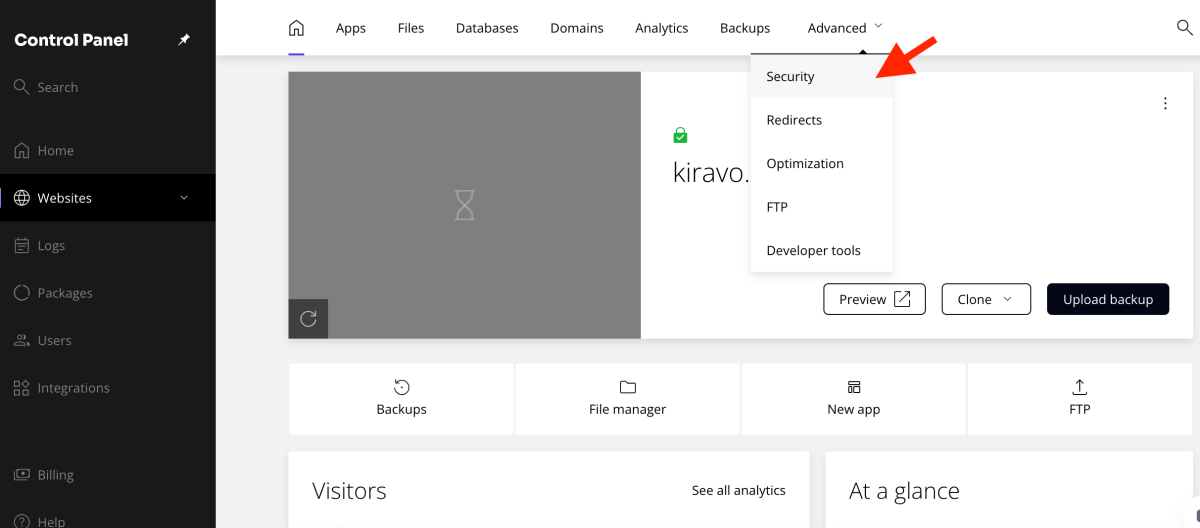
3. Enable Force HTTPS
This final step ensures that all visitors connect to your site securely.
While in the Security tab, find the Force HTTPS option.
Toggle it to the “on” position. This will automatically redirect all HTTP traffic to the secure HTTPS version of your site.
Your website is now secured. This setup not only protects your data but also signals to visitors that your site is trustworthy.
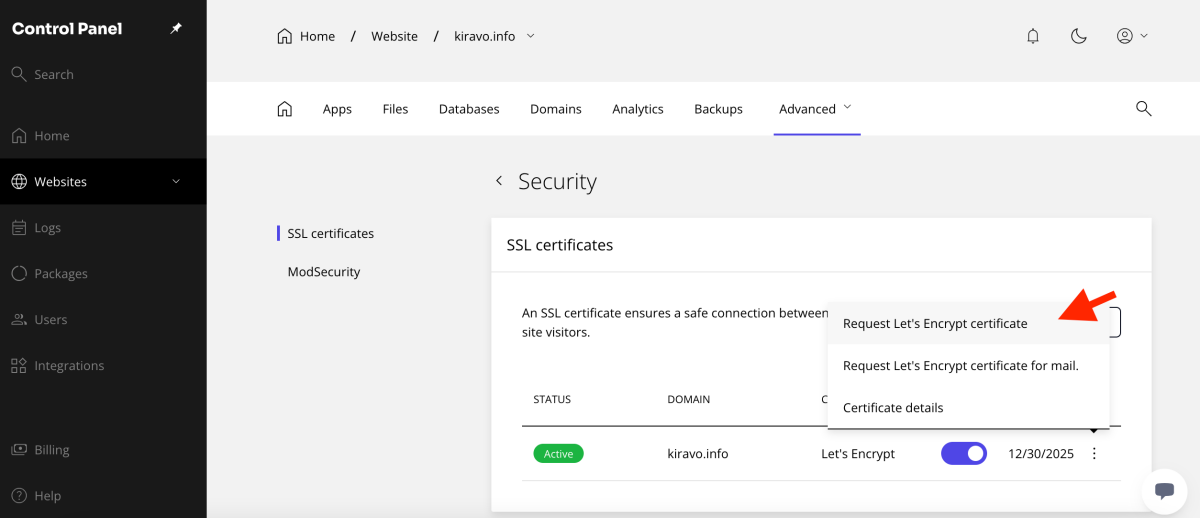
Optional – issue the certificate manually
In some cases, you may need to request an SSL certificate manually. Go to the Security section, click the three-dot menu, and select “Request Let’s Encrypt Certificate.”
Click Request to start the process.
Once your SSL certificate is active, enable HTTPS by toggling the Force HTTPS option in the control panel. Your visitors will then be able to access your site securely.
If you need help, do not hesitate to contact the Kiravo support team.
Leave a Reply