To manage DNS records in the Kiravo control panel, log in, select your website, then go to Domains and click on your domain. Here you can edit, delete, or add new records like A, CNAME, and TXT, as well as automatically configure MX records for Google Workspace.
Managing your DNS records is an essential component of controlling your online presence, from directing your website to configuring email services. At Kiravo, we have simplified this process, offering you intuitive tools directly within the control panel. This post will guide you through the necessary steps to manage your DNS records efficiently.
Tutorial for managing DNS records on Kiravo control panel (video + text)
For a visual demonstration of how to manage DNS records in the Kiravo control panel, we invite you to watch our video tutorial below.
If you prefer to follow instructions at your own pace, the written guide details each action shown in the video, ensuring you have a complete resource to manage your DNS records with confidence.
1. Access the DNS management section
The first step is to navigate to the area in your control panel where you can manage your domain’s DNS records. Log in to your Kiravo client account.
From your dashboard, access your managed WordPress hosting service. Click Access Control Panel to enter the control panel. In the panel, select your website, then navigate to the Domains section.
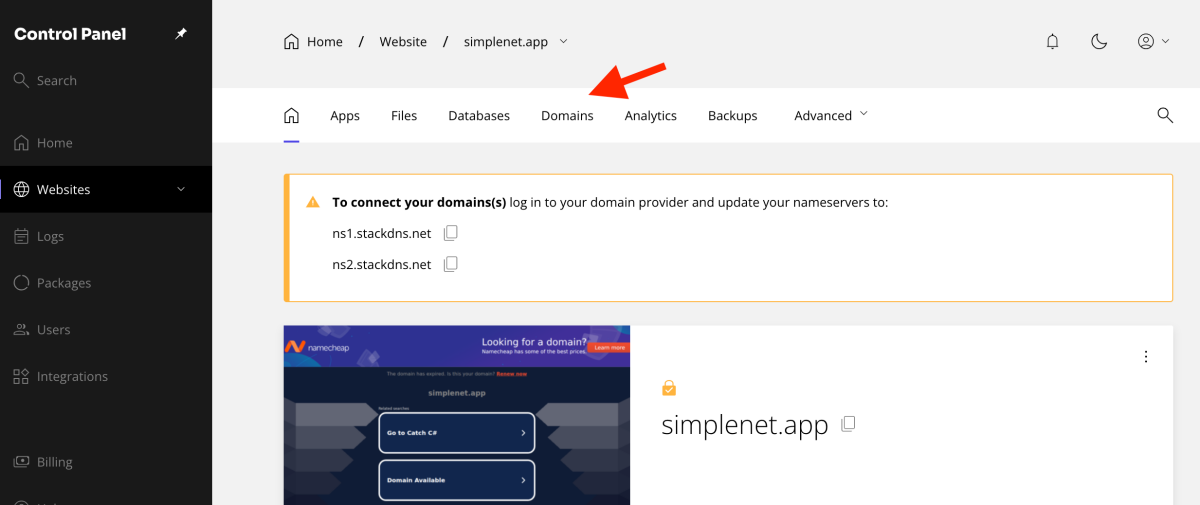
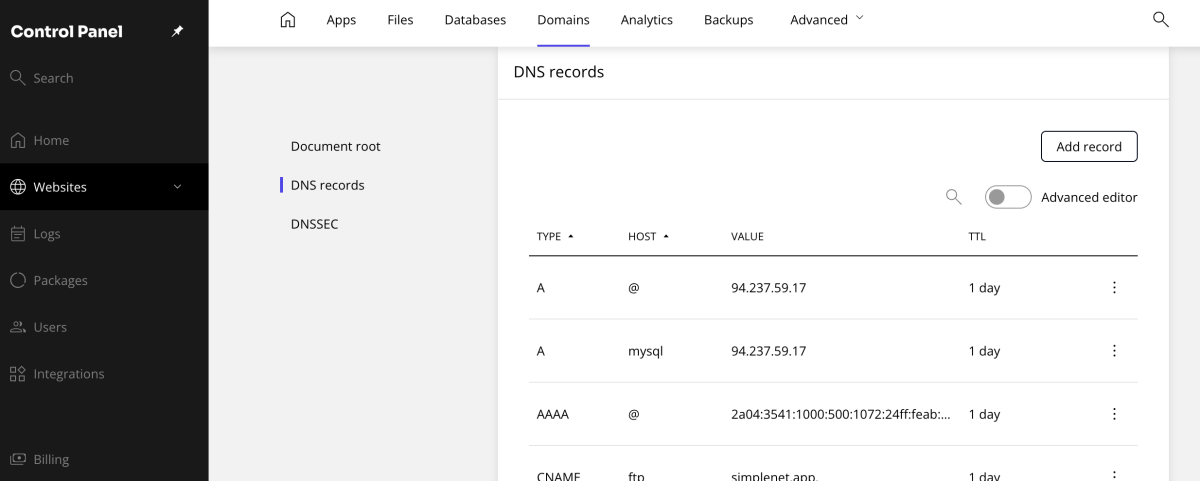
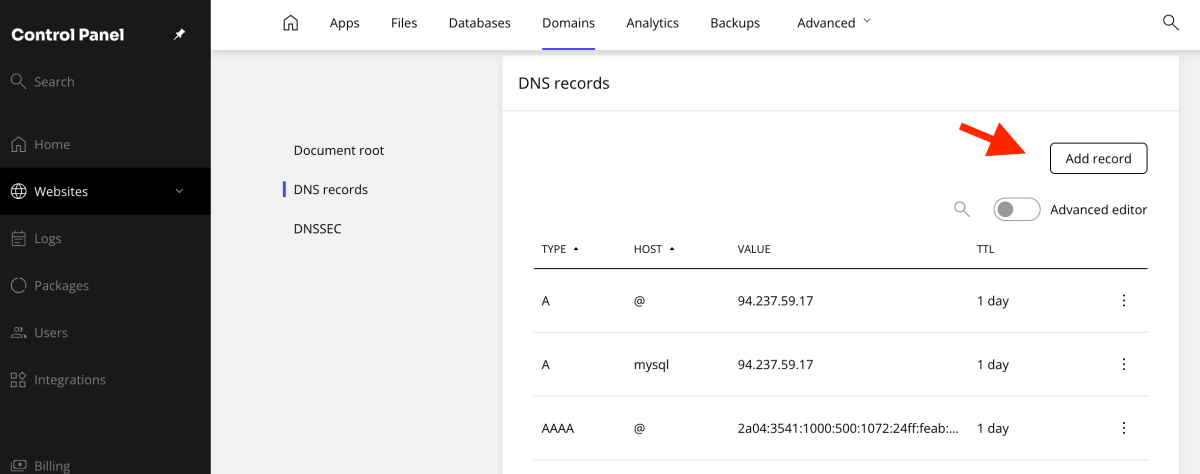
Click on the domain for which you wish to manage DNS records. You will now see your list of DNS records.
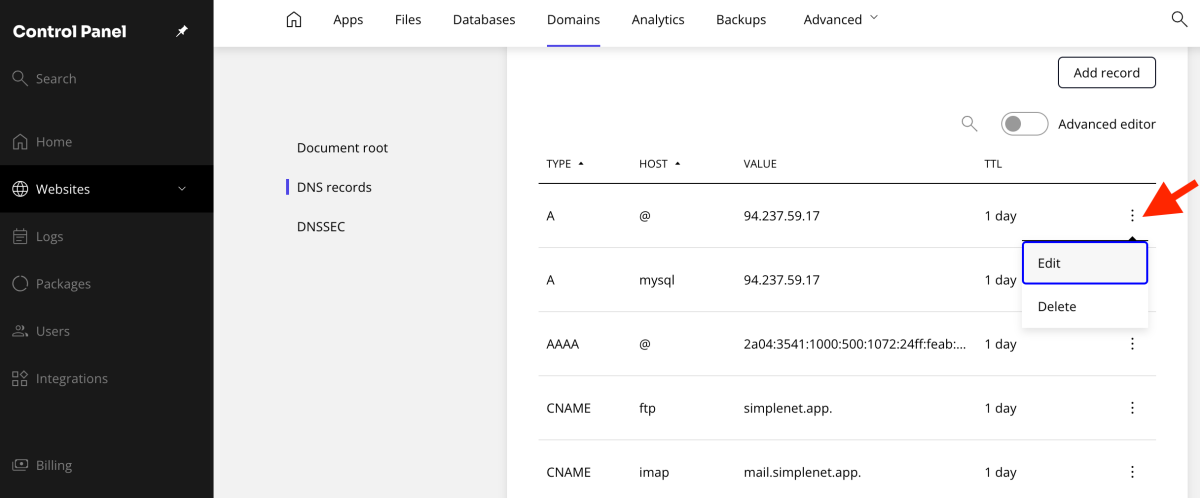
2. Edit or delete existing records
You have the flexibility to modify or remove existing DNS records. For each record, you will find options to either edit or delete it by clicking the three dots.
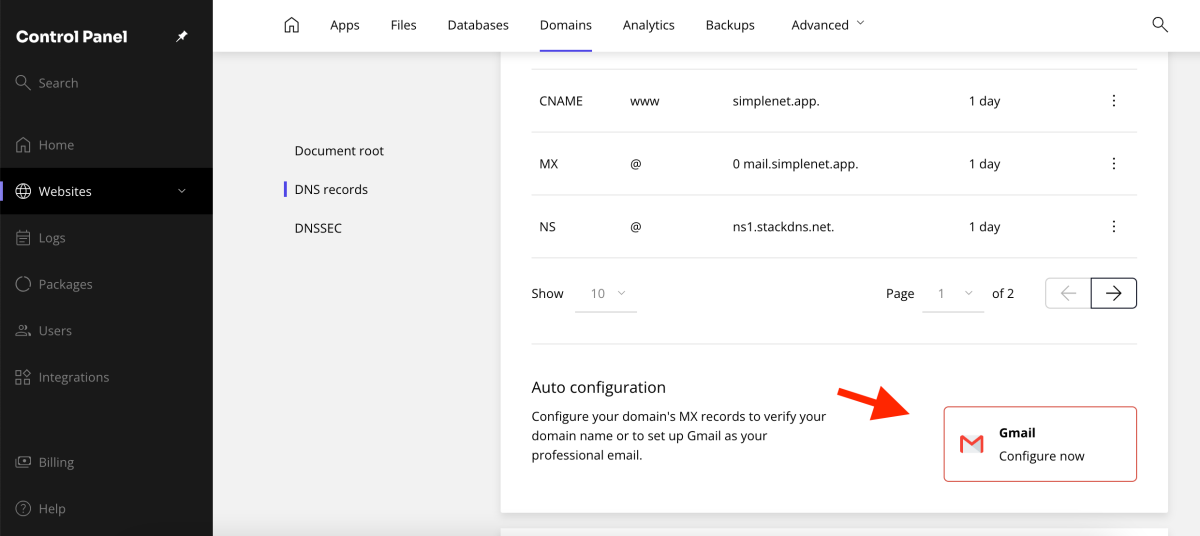
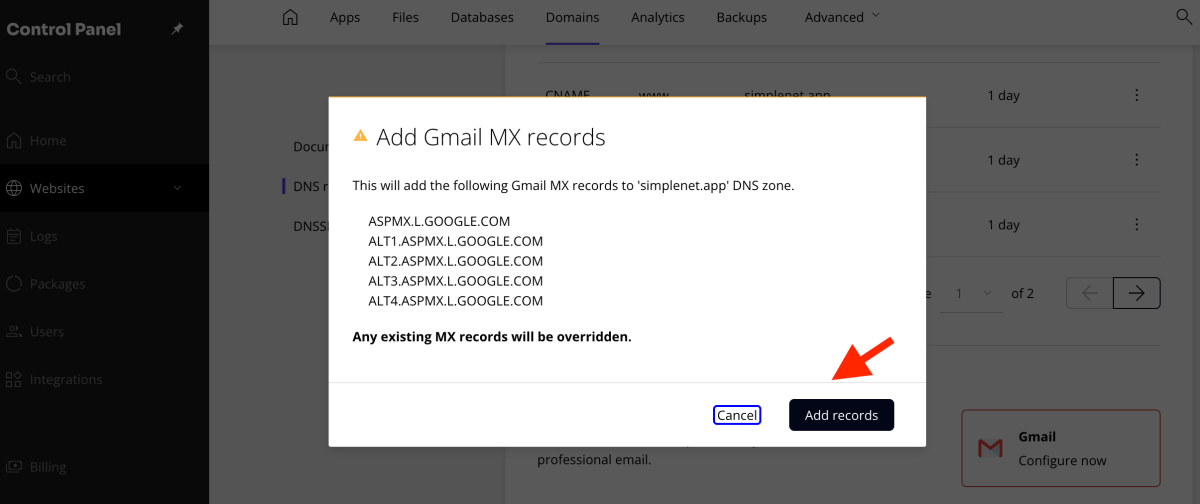
3. Auto-Configure MX Records for Google Workspace
If you use Google Workspace for your email, you can automatically configure the necessary MX records.
Click the Gmail Configure now button, available in the Auto configuration section. This action will automatically add the correct MX records for Gmail.
Click Add records to confirm.
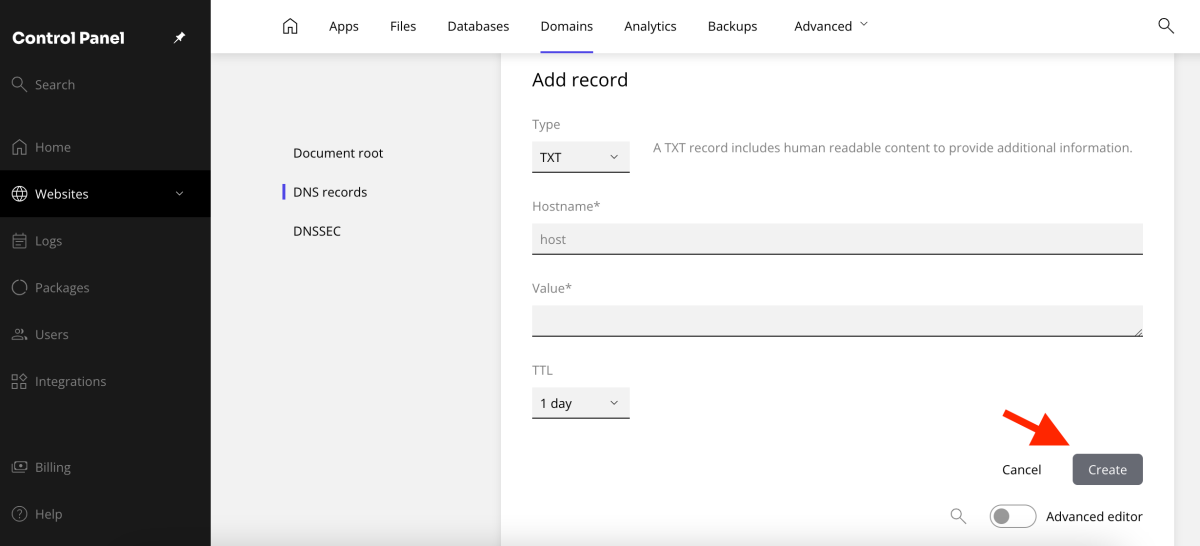
4. Add new DNS records
You can manually add various types of DNS records to configure specific services. Click the Add Record button.
Select the record type (e.g., A, CNAME, TXT, MX, SRV). Enter the hostname and the value for the record. Click Create.
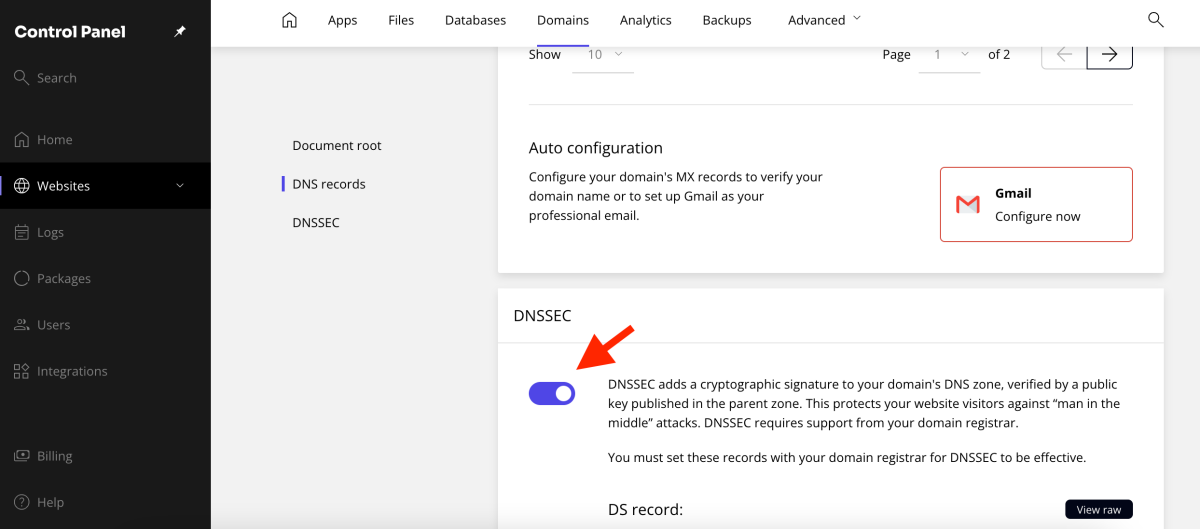
5. Enable DNSSEC
DNSSEC provides an additional layer of security for your domain, protecting it against spoofing attacks.
You can enable DNSSEC from this same section, offering enhanced protection for your website visitors.
Managing DNS records through the Kiravo control panel is a straightforward process designed to give you complete control.
If you have questions or need assistance, refer to our knowledge base or contact support.
Leave a Reply