To restore your WordPress site, log in to your Kiravo client area, select your hosting plan, and log in to the control panel. Navigate to your site, click Backups, choose a date, and click Restore.
Our automated backups provide a simple way to revert your site to a previous state. The process is managed directly from your control panel and ensures you can recover your data with minimal steps.
Guide to restoring your website (video + text)
We have prepared a brief video that walks through the entire process, from logging in to the final confirmation.
For a detailed reference, you can follow the written instructions below.
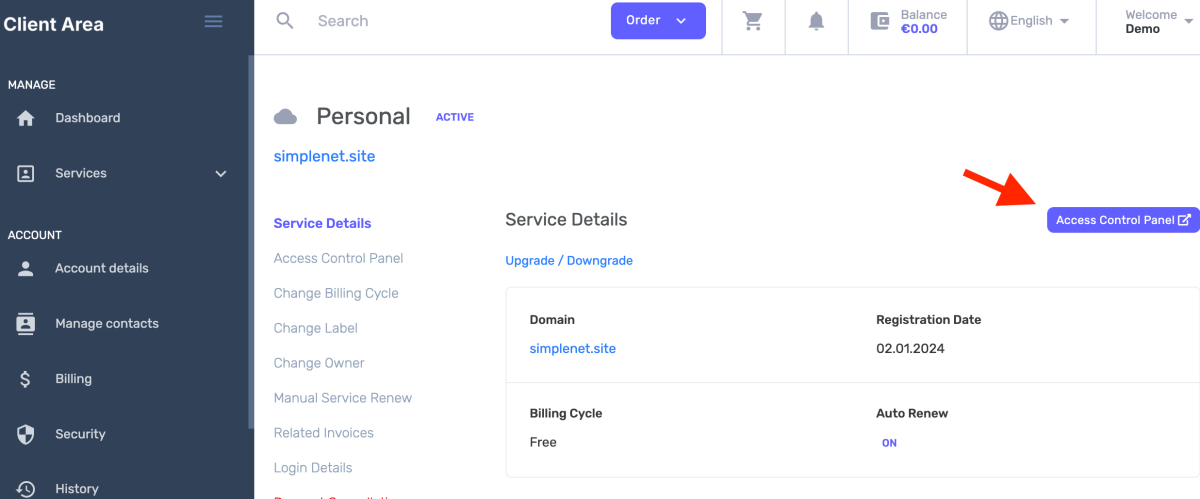
1. Access your Kiravo control panel
To begin, log in to your Kiravo client area and click on your active hosting plan. To To log in to the control panel click the Access control panel button.
2. Go to the Backups section
Once in the panel, navigate to your website and open the Backups tab.
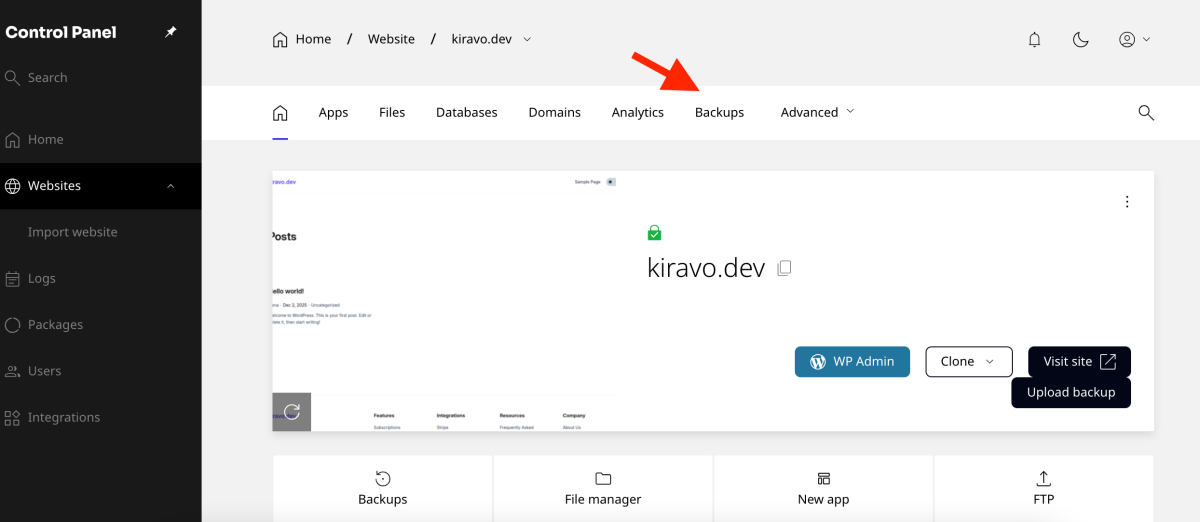
You will see a list of available automated backups organized by date. Choose the date you wish to restore from and click the Restore button.
3. Choose to restore the full website or use Custom
You will have the option to restore the full Website or use Custom to restore only the files or the database.
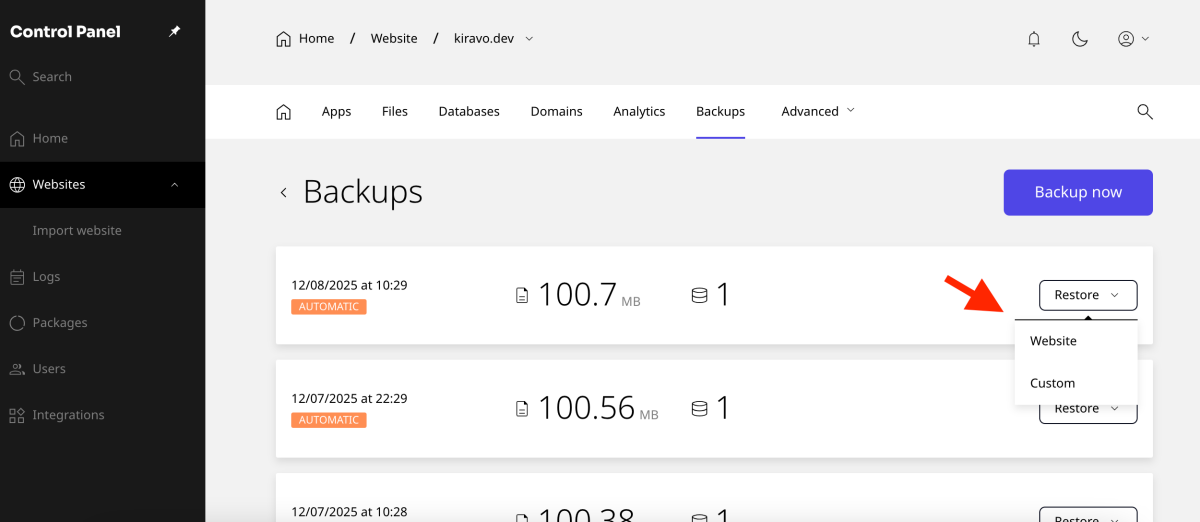
After confirming the action, the restoration will begin. Please note that this will override any changes made after the backup date. The process may take a few moments, depending on the size of your site.
The restoration is now complete. Your site has been reverted to the selected date.
If you have questions or need assistance, refer to our knowledge base or contact support.
Leave a Reply