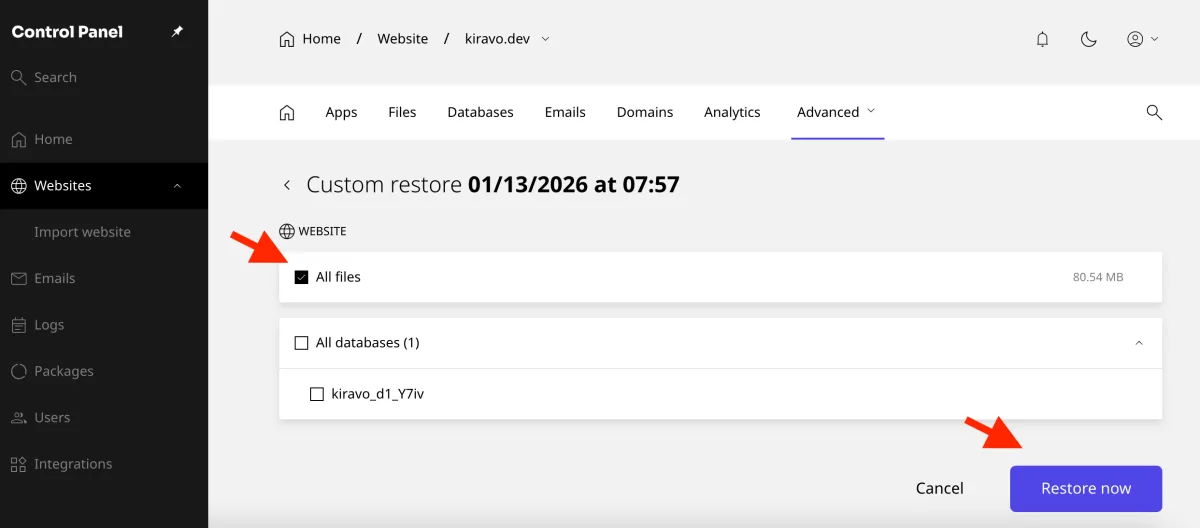
Log into the Kiravo control panel and select your website. Go to the Backups section. Choose a restore point. Click Restore and select the Custom option. Select all files and click Restore Now to finish the process.
Kiravo provides automated backups to protect your hard work. Technical errors or accidental deletions require a fast solution. Our hosting panel includes a direct way to revert website files. This guide outlines the steps to recover your data.
Restoring files tutorial (video + text)
Section titled “Restoring files tutorial (video + text)”This guide outlines the steps to recover your data.
https://youtu.be/Bc9BWKCWJBI?si=asvjrBT-EltQsRjn
If you prefer to follow written instructions at your own pace, the detailed guide below outlines each step shown in the video.
Log in to the Kiravo control panel
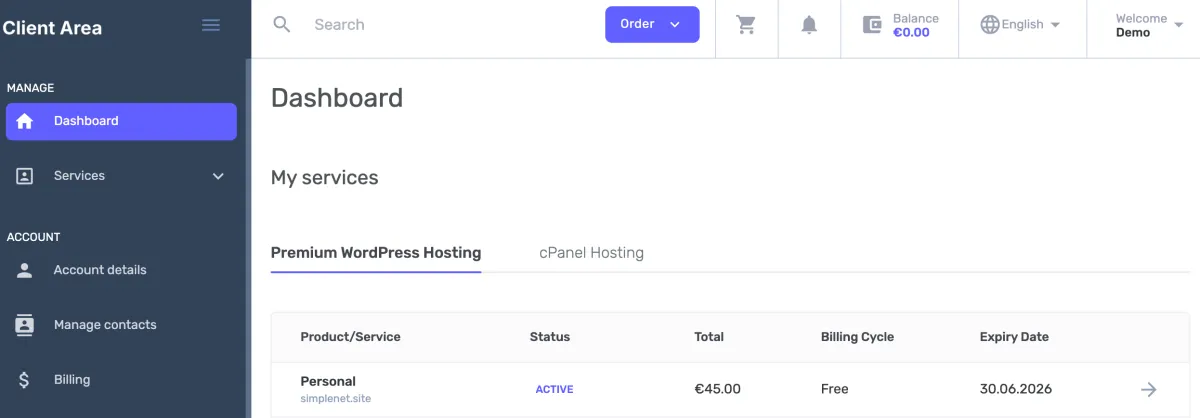
Section titled “Log in to the Kiravo control panel”Begin by logging in to your Kiravo client account. On your dashboard, you will see a list of your hosted services and websites. Click on the domain or website you wish to manage.
Select your website
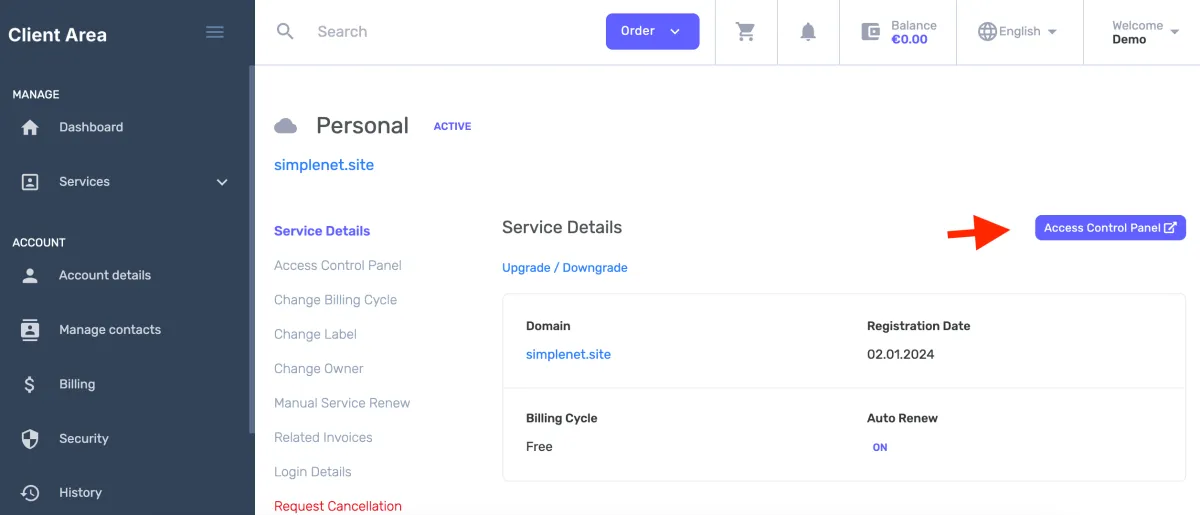
Section titled “Select your website”Click the Access Control Panel button. This will open the specific site administration area.
Access the Backups section
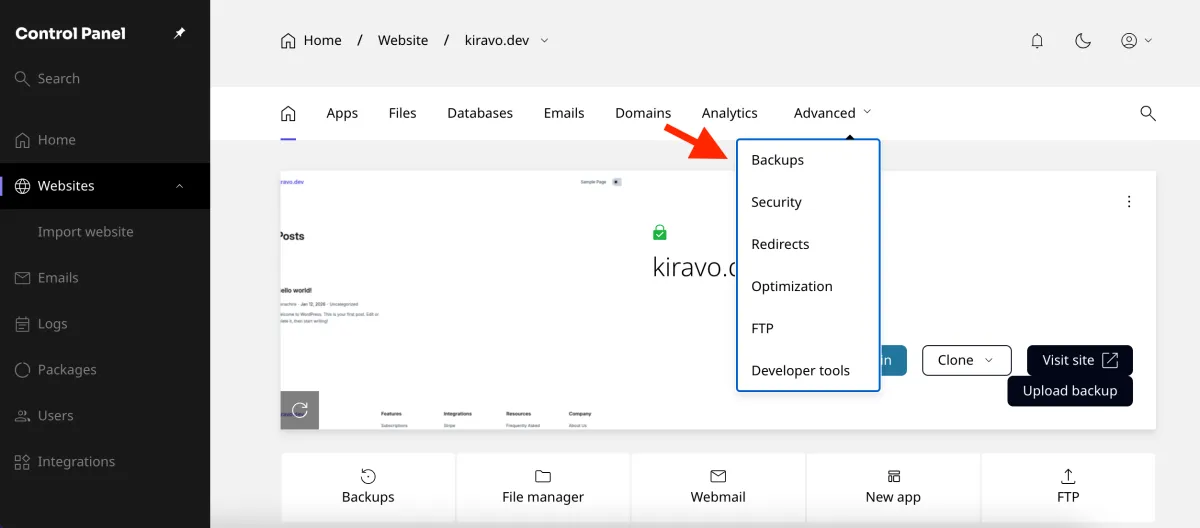
Section titled “Access the Backups section”Locate the Backups section in the main menu. This area shows a list of available automated backups.
Choose a restore point
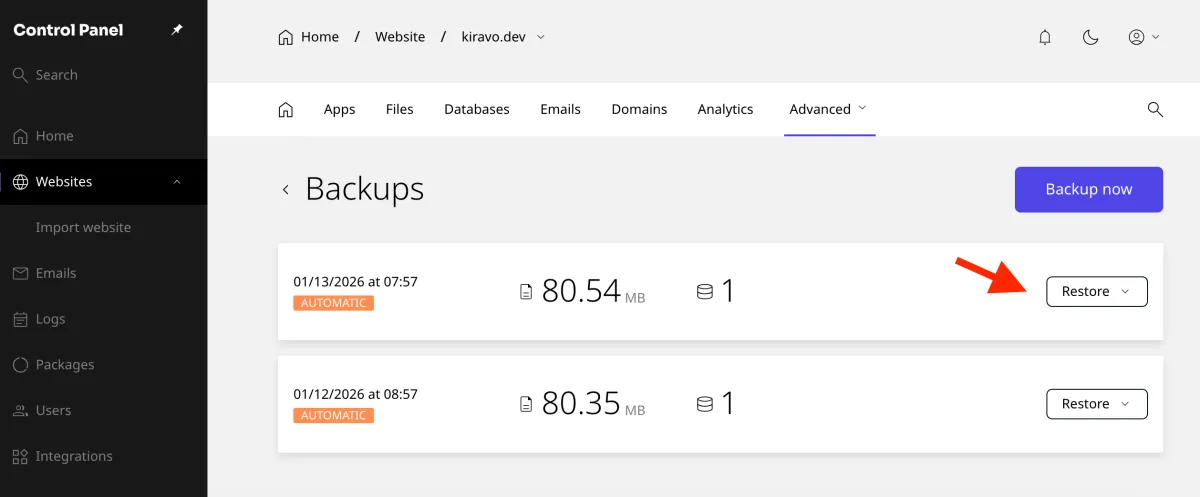
Section titled “Choose a restore point”Browse the available dates. Select the restore point representing the best state for your site. Click the Restore button next to your choice. This action opens the restoration configuration.
Select Custom File Restoration
Section titled “Select Custom File Restoration”Click on the Custom option. Specific control over the restoration process starts here.
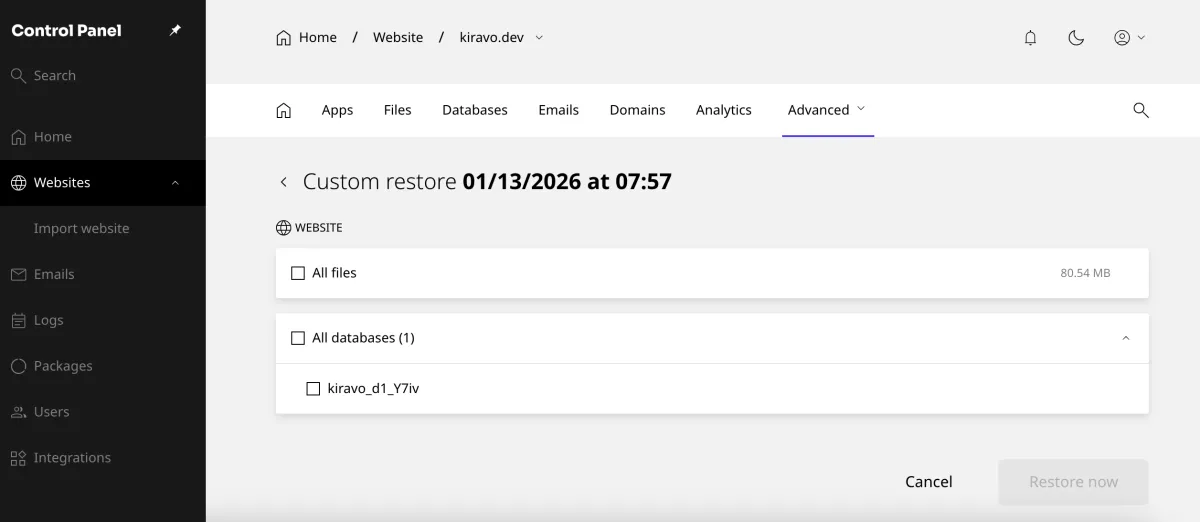
Select All files from the provided list. Click the Restore now button to move to the final confirmation.
Finalize and monitor the restore
Section titled “Finalize and monitor the restore”Click the final Restore button.
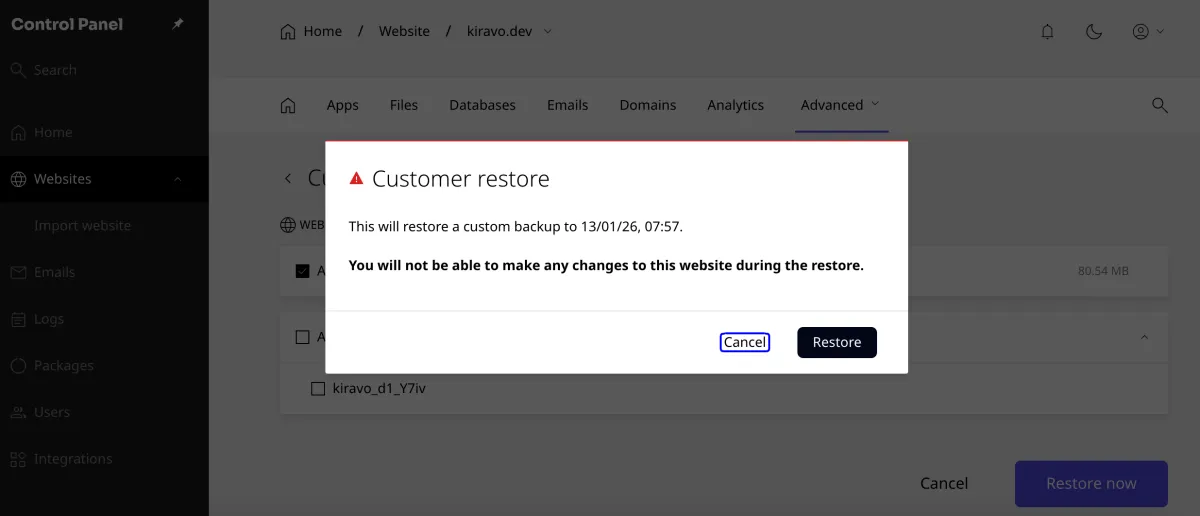
The system begins copying files back to your hosting account. Restoration time depends on website size. Small websites finish almost instantly. Wait for the confirmation before refreshing the site.
If you need assistance, do not hesitate to contact us.