How to order a new service
Use this guide when you already have a Kiravo account and want to add another service. For your first purchase, follow How to place an order, which also covers creating an account during checkout.
An order starts in the Kiravo client area. You will use the separate hosting control panel only after Kiravo activates the service.
-
Start a new order
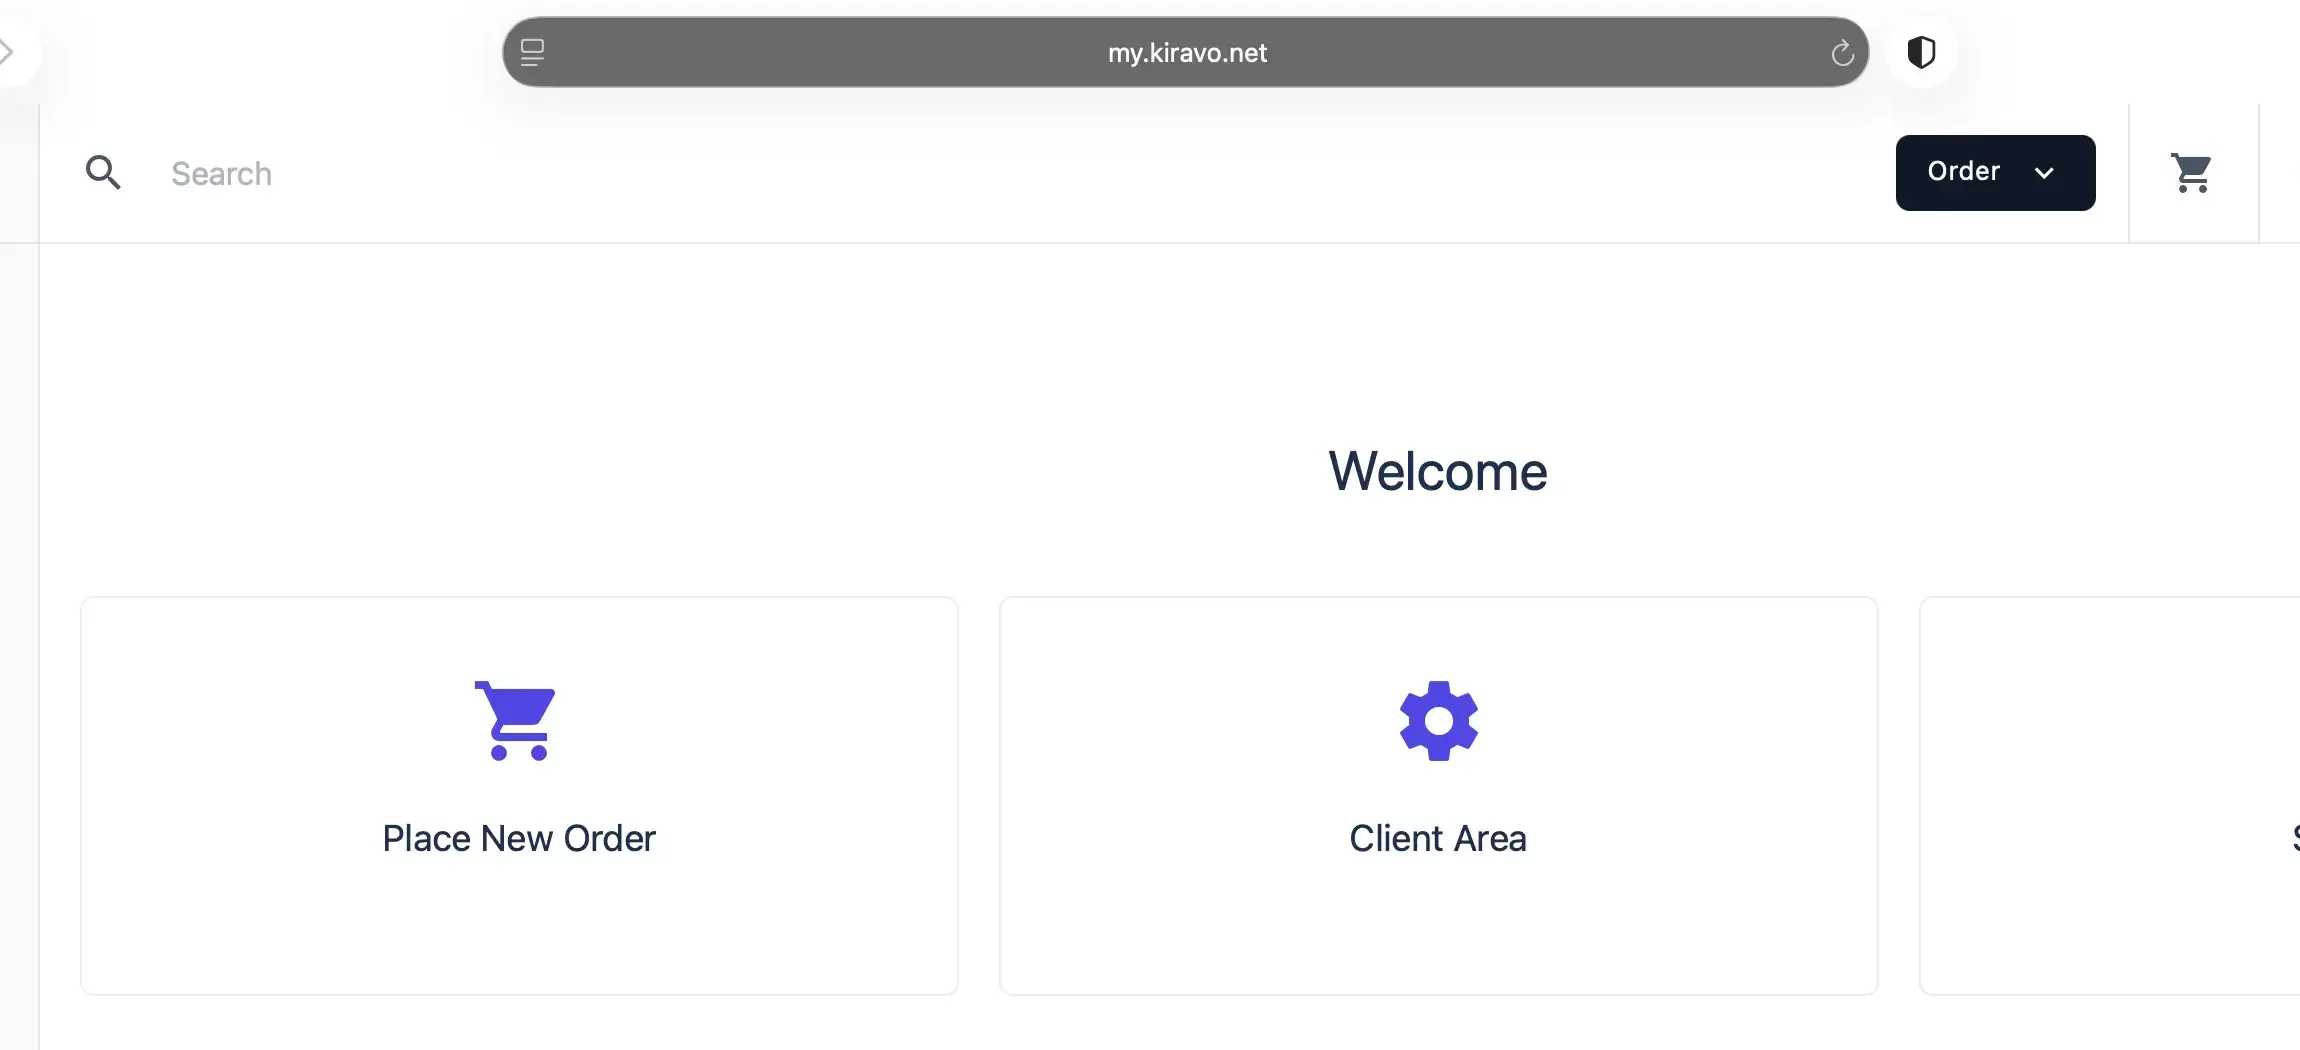
Sign in to the Kiravo client area. Click Order in the top bar or Place New Order on the dashboard.
The Order menu currently groups the catalog into Business, Publisher, eCommerce, Managed Cloud Servers, Domains, and WordPress Services. Choose the category that matches what you need. Use the domain order flow when you want to register a domain rather than add hosting.
-
Choose a product or plan
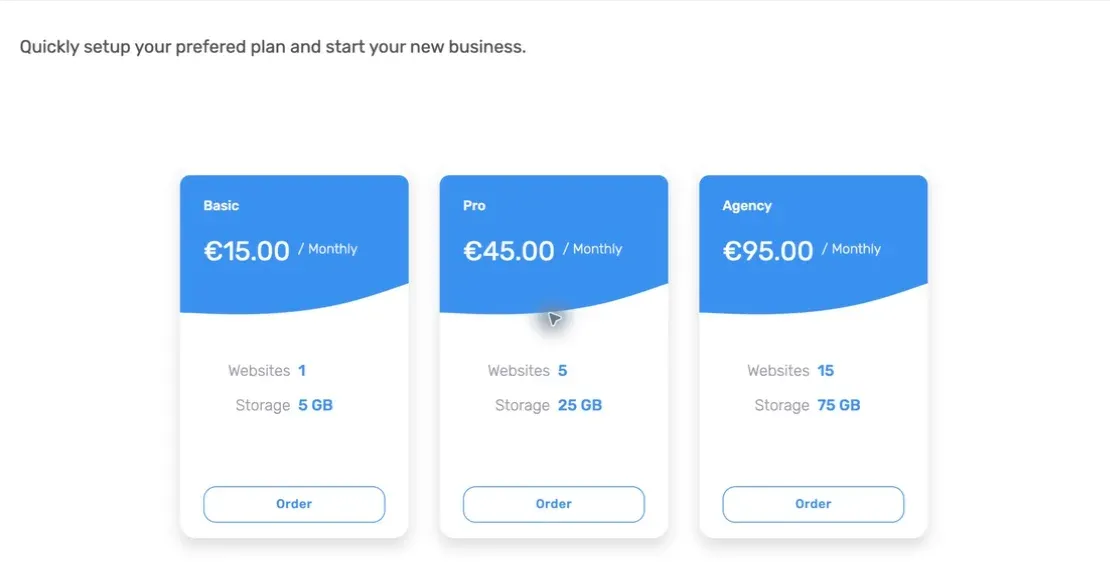
Compare the price, billing interval, and included resources. Hosting plan cards show limits such as the number of websites and storage. Click Order on the product you want.
-
Configure the product
Confirm the selected product and choose its billing cycle. Check the currency, setup fee, recurring price, and cart subtotal shown on the page. Available cycles and currencies depend on the product.
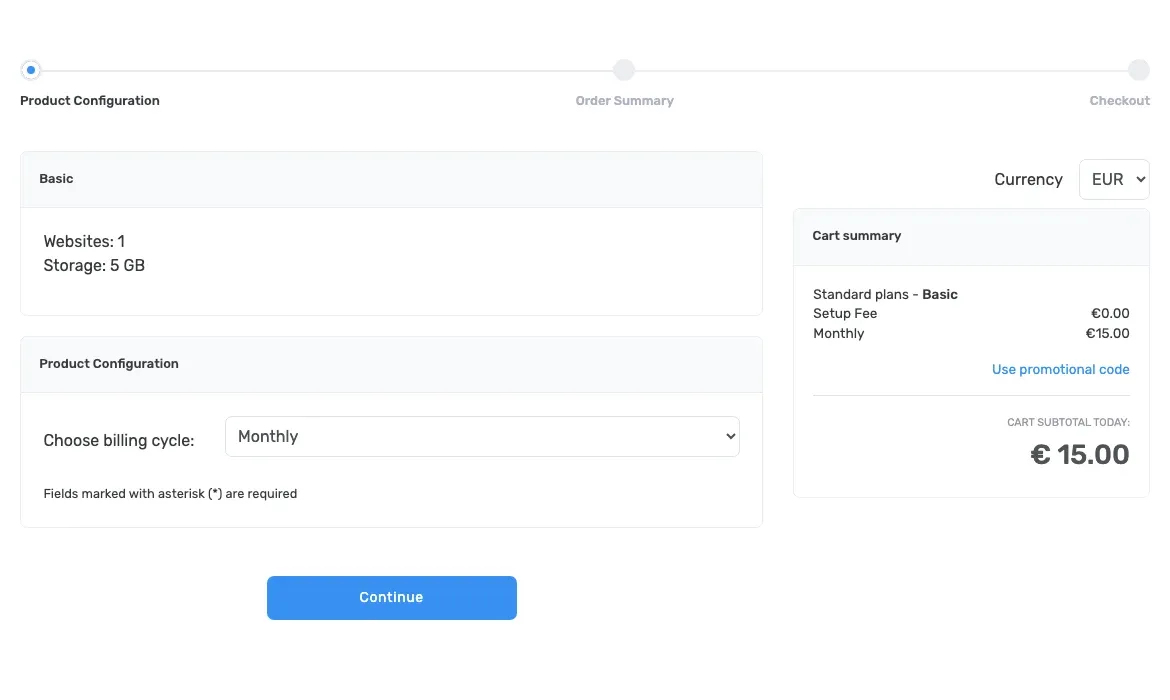
Apply a promotional code before continuing if you have one. Click Continue after the configuration and subtotal are correct.
-
Review the order summary
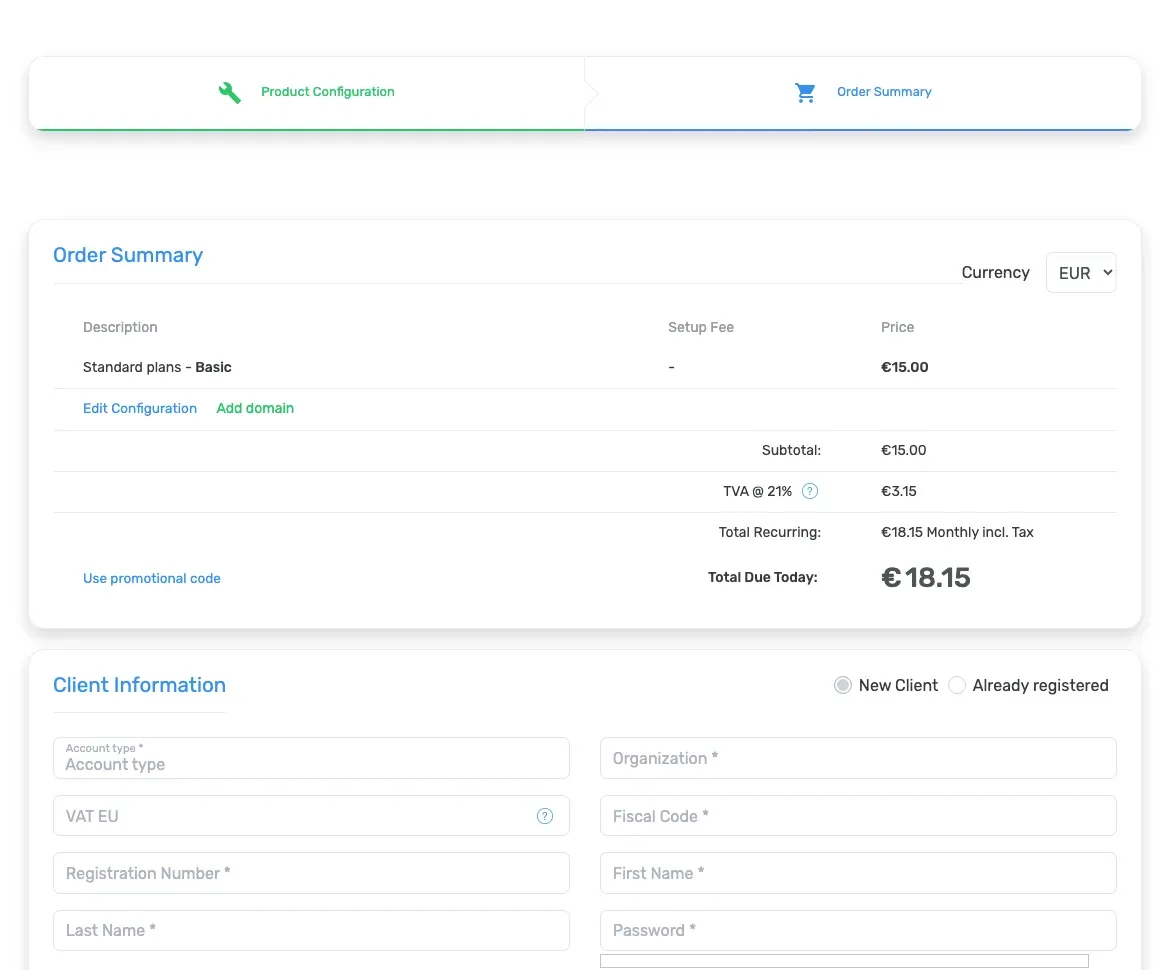
Check the product, subtotal, applicable tax, recurring total, and Total Due Today. Taxes and totals can change with the billing country, validated tax information, currency, and billing cycle.
Use Edit Configuration to correct the product settings. Use Add domain only if you also want to register a domain with this order.
-
Confirm the account and payment details
Because you started from a signed-in account, make sure checkout is using the intended account and billing details. Read the Terms of Service and Acceptable Use Policy, select the acceptance checkbox, and enter the payment details requested by checkout.
Review Total Due Today once more before selecting Checkout. Do not refresh the page or submit the form again while payment is processing.
-
Follow the order after payment
Keep the order number from the confirmation page and check your email for payment and service messages. Do not publish a screenshot of the confirmation page because it contains account-specific identifiers.
Payment confirmation does not always mean that the service is ready immediately. Open Services in the client area and use the status shown there as the source of truth. When the service becomes active, open its details to access the hosting control panel.
If an order remains pending or the payment result is unclear, open a support ticket and include the order number. Do not include your card number, password, or a checkout session link.